![]()
Greetings, fellow data analysts!
The data required for management information is not always already available in the data warehouse. Sometimes, you have to piece it together from Excel spreadsheets, Access files, or other sources at a spur of the moment. Today, this is called Self-Service BI – and DeltaMaster is the optimal tool for these types of tasks. The software supports you not only in analyzing and visualizing data but modeling new data sets as well. Best of all, you don’t need any help from the IT department or any special technical skills. You can also utilize proven concepts in data modeling, for example, member properties to add information or even images to reports or to publish in several languages. In the first two parts of our series, we already explored various ways to use member properties in DeltaMaster. In this edition, we will show how to make them accessible in a new analysis model.
Best regards,
Your Bissantz & Company team
In the past two issues of DeltaMaster clicks!, we introduced the concept of member properties (also known as attributes) and explained the various ways you can use them in DeltaMaster. Up until now, we assumed that the member properties already existed in the database. Adding them to the database is an aspect of data modeling, which DeltaMaster supports in two different ways:
- DeltaMaster Modeler is designed for building larger applications with Microsoft SQL Server Analysis Services. This module is targeted to professionals who have experience in working with databases. It reduces the work required for routine tasks and provides many advantages by standardizing data preparation and modeling.
- To create simpler applications in terms of Self-Service BI, you use DeltaMaster TableWizard/ CubeWizard or the Model mode of DeltaMaster 6. No programming or database skills are required. The data that you need to process is typically stored in Excel or Access files (i.e. XLS or MDB files). You can also connect to ODBC or OLE DB data sources.
On the following pages, we will show how you can create member properties using TableWizard or the Model mode of DeltaMaster 6.
Columns of properties
We will start the following example with an Excel file that contains raw data from our “Chair” reference application and has already been loaded into a new Analysis Model in DeltaMaster. For more information about these first steps, please read DeltaMaster clicks! 04/2010.


The table’s setup is typical for data sets in self-service applications: The rows of the table contain business transactions (e.g. sales contracts or invoice data) while the columns show various attributes and KPIs for these transactions. Many times, several attributes refer to the same object. For each customer, for example, there is a customer number from the database (“CustomerID”), name (“CustomerName”), and branch classification (“BranchName”). Each product has an ID (“ProductID“), a name in English and German (“Product_EN”, “Product_DE”) as well as size and weight information. The table also contains hierarchy data for the product dimension. This includes information on the product group and product main group, which also have their own IDs as well as English and German names. The table also contains measures (revenues, discount, etc.), which, as an exception, are not relevant in the context of our topic.
With DeltaMaster TableWizard, you can create an analysis model for DeltaMaster with this data. The model can be multidimensional – in other words, an OLAP cube, which you can build using DeltaMaster CubeWizard (see DeltaMaster clicks! 01/2013). It can also be relational, which means there is no intermediate storage. OLAP cubes have advantages if you want to add additional means of comparison (as calculated members) or KPIs (as user-defined measures). For working with member properties as described below, there is no difference between multidimensional and relational models.
Here’s how
During the modeling process, you define how you want to use the data columns in the analysis model: in a dimension or as a measure. In a dimension, the values of the column can take on various tasks: They can form the base dimension members, combine dimension members into groups (levels), or describe dimension members – which brings us back to the topic of member properties.
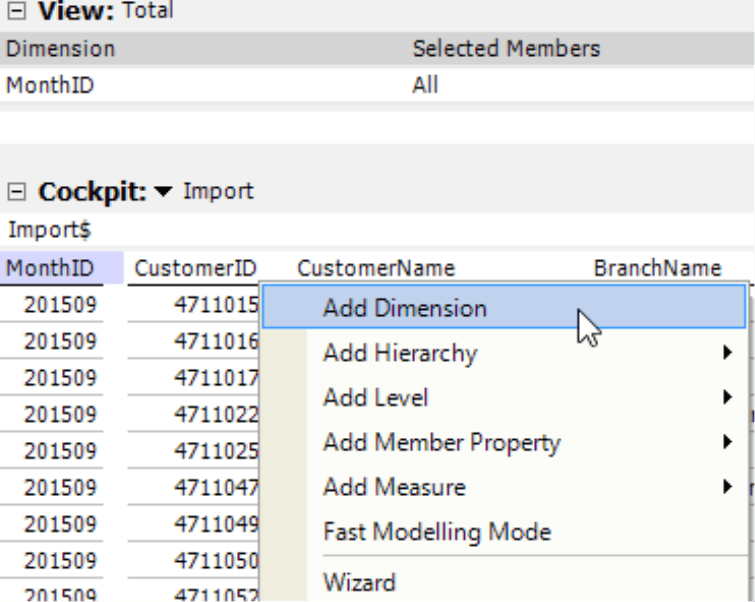
To define a field as a property of a dimension level using TableWizard, you will first need the dimension. You can then assign one or more properties to its levels. You can add a Dimension in the context menu of the column header. In our example, we have already modeled the time axis. So we continue with the column “CustomerID”.
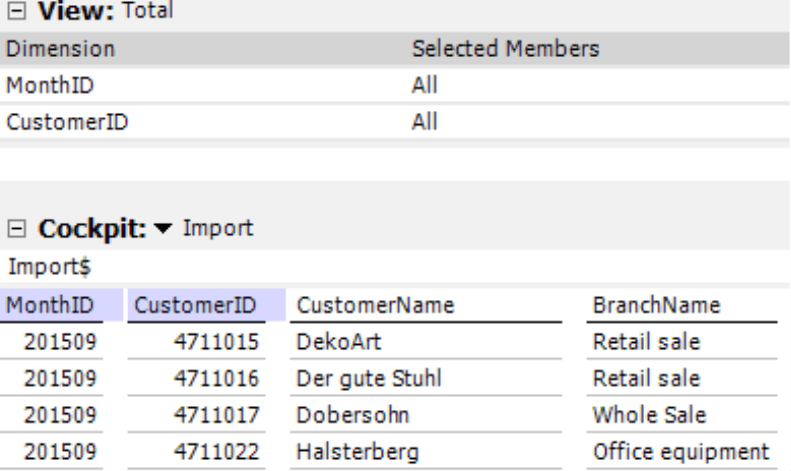
The new dimension is immediately available in the View window. The column header in the table is colored in purple to show that this column is used as a dimension (or hierarchy or level).
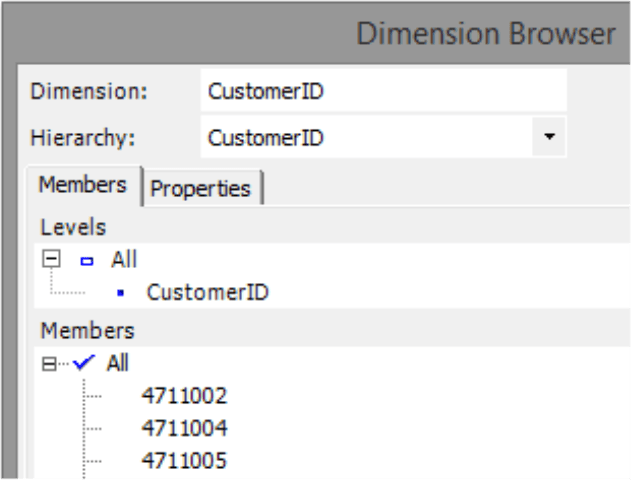
If you use the Dimension Browser to take a closer look at this dimension, you will see that DeltaMaster created dimension members from the values in the column “CustomerID“ and placed them on the lowest level of a new hierarchy with the same name. DeltaMaster automatically added the sum member “All” and the respective level. It also used “CustomerID”, the name of the field that was used to build up the structure, as the name for the level, hierarchy, and dimension.
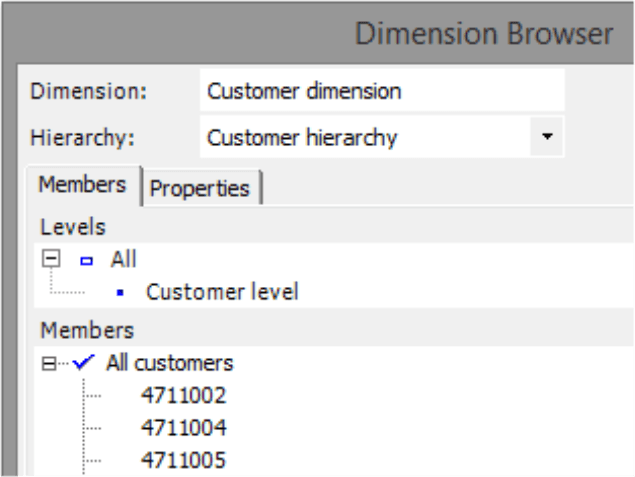
You can easily change the names of these structural components. For example, you can rename the sum member and levels in their respective context menus (or by hitting the F2 key), the hierarchy through the I want to menu, and the dimension by directly editing the name (alternatively: I want to menu, or, when the Dimension Browser is closed, you can also change the name with a double click or by selecting the respective entry in the context menu of the View window.)
It is recommended to use clean naming conventions from the start. The names used in this example are very clear, almost to the point of exaggeration for instructional purposes.
In the new customer dimension, you can now assign properties to the customer – for example, a name, “CustomerName” – using the respective entry in the context menu.
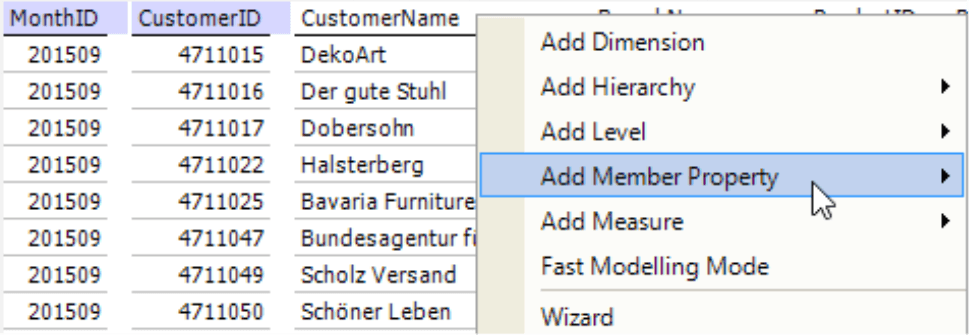
DeltaMaster will then ask where it should assign the property in two steps – specifically, in which dimension (or dimension and hierarchy if there is more than one hierarchy) and on which level. If you click on the name of the level, DeltaMaster will take over the field as a member property.
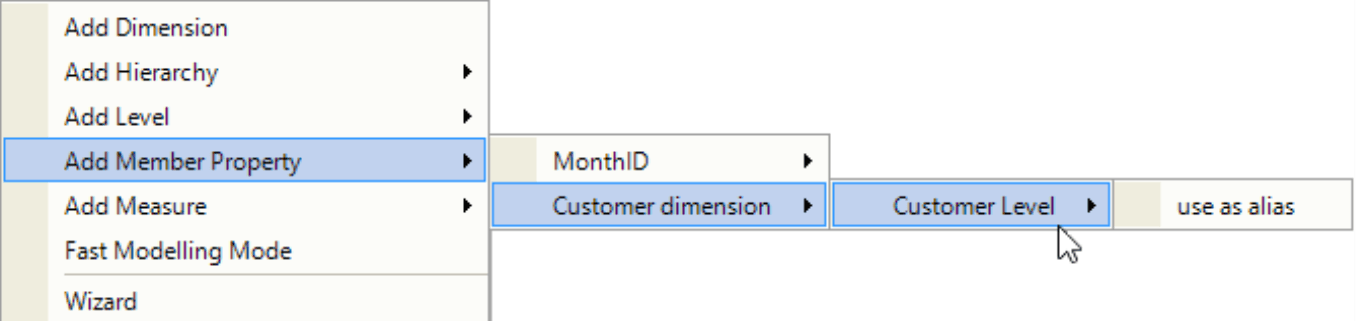
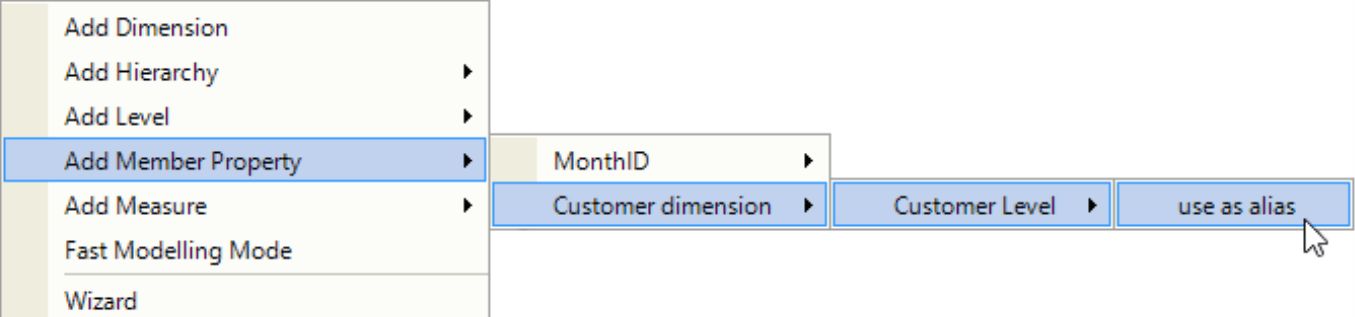
You can opt to add the new member property as an alias for the dimension member as well. Click on the option that DeltaMaster displays as a third step to the right of the member name.
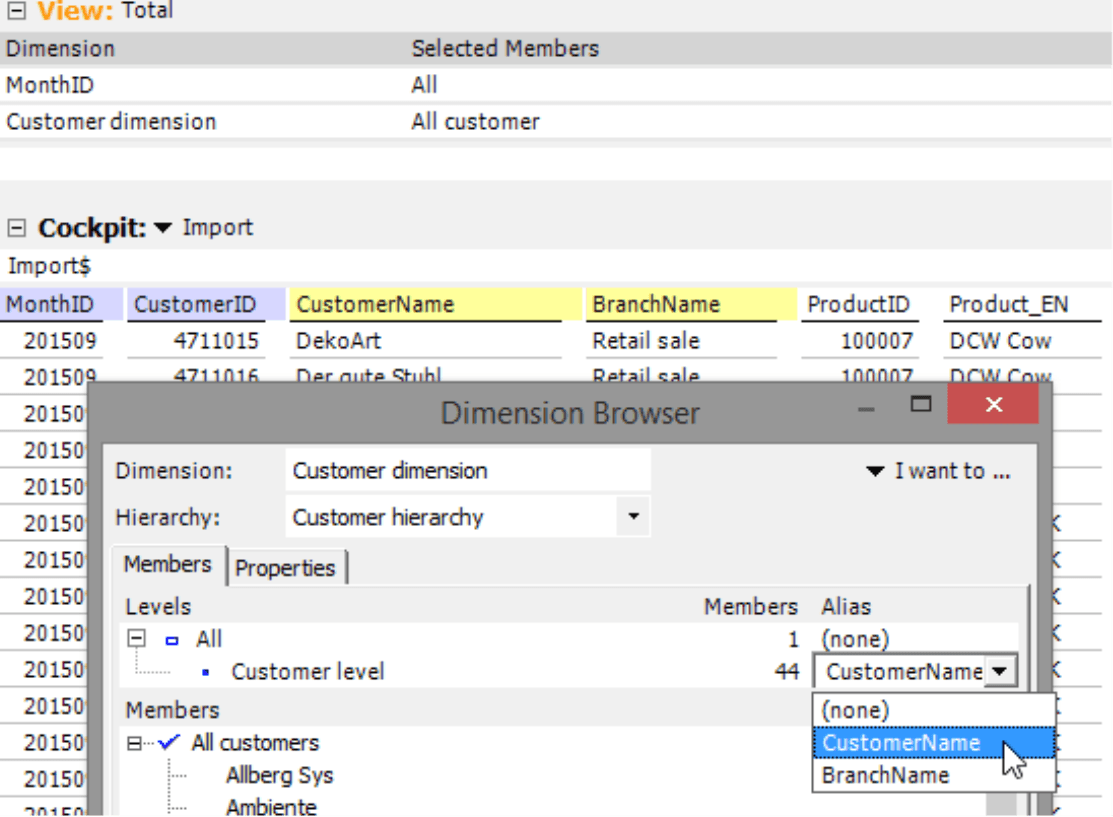
DeltaMaster colors the fields used as a property in yellow. You can remove this member property using the respective entry in the context menu.

If you want to use a field in multiple hierarchies, hold the Alt key while opening the context menu. Now you can add further Member Properties. If you mouse over the column header, DeltaMaster will display all usages of the field as a tooltip.
You can instantly see the modeled properties in the Dimension Browser and use them in reports and analyses as described in DeltaMaster clicks! 11/2015 and 12/2015. On each level, you can select one of the member properties as an Alias, which is valid for the entire application. Alternatively, you could also define in the data source table that DeltaMaster should use a property as an alias (see the fourth screenshot on the previous page).
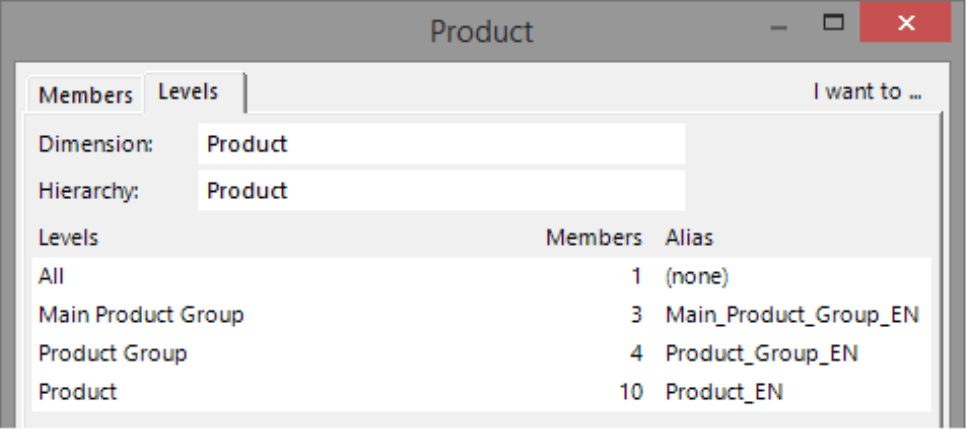
The screenshot on your right shows how the product dimension was modeled from the sample data. To define several member properties at the same time, press and hold the Ctrl key, click on the desired column headers, and then select the respective menu from the context menu. All Properties of a level are displayed in the Dimension Browser on a separate tab.
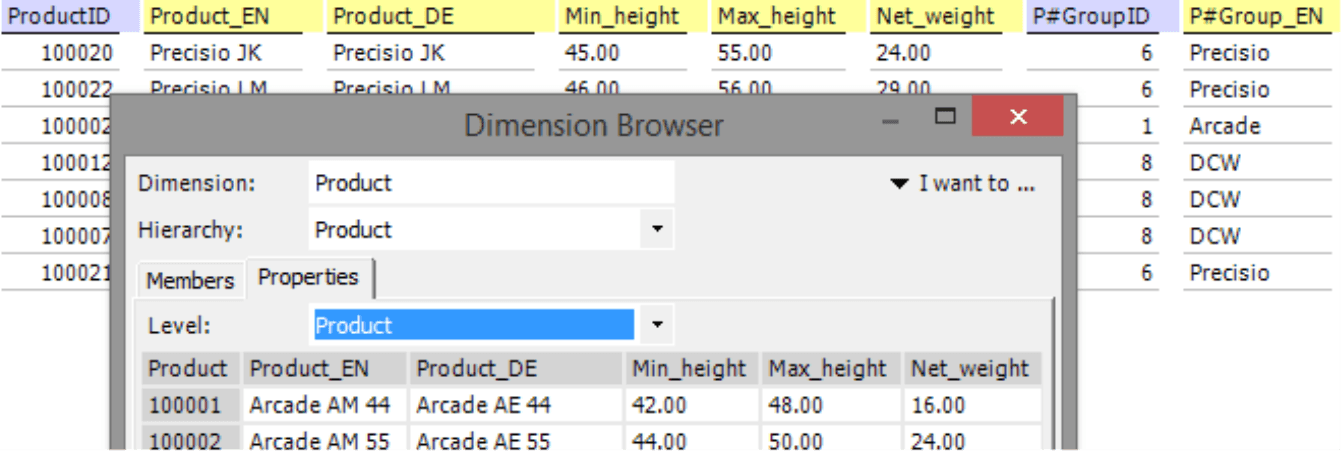
The member properties that you create with TableWizard are always for a specific level. This has to do with the underlying database technology – namely, relational models or models based on Microsoft Analysis Services with regular, level-based hierarchies (see DeltaMaster clicks! 11/2015, page 3). You cannot create cross-level properties with TableWizard.
Even simpler in DeltaMaster 6
Building self-service applications is even easier in DeltaMaster 6.1.0. Once you have selected the data source (Application menu ![]() , New), e.g. an Excel file, DeltaMaster will switch to Model mode.
, New), e.g. an Excel file, DeltaMaster will switch to Model mode.
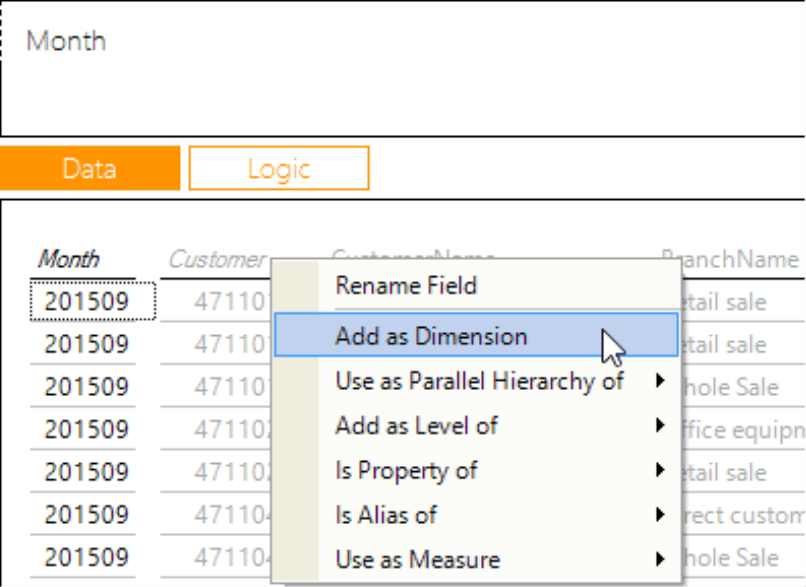
You can create a dimension by dragging a field from the data table and dropping it on the upper part of the filter bar or using the respective function in the context menu. The context menu also contains an option to rename the field. This function is much more comfortable in DeltaMaster 6 than in DeltaMaster 5: When renaming the field in the table view, DeltaMaster will change the name of the dimension, hierarchy, and level as well. The fields that have already been used will be in black type while the unused ones will be gray. Renamed fields are displayed with cursive type in the column header.
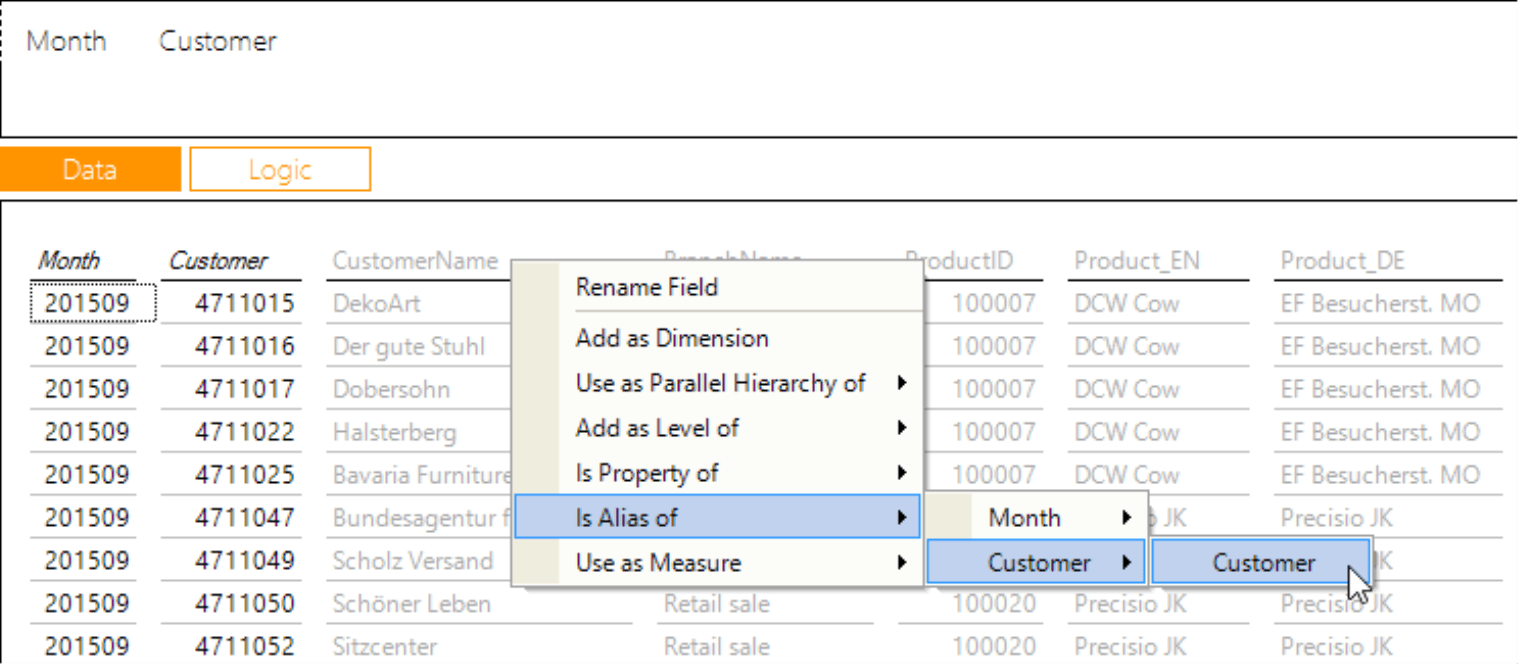
DeltaMaster 6 uses clear words to describe how the member properties should be used. The context menu determines if a field is (solely) the Property of a dimension level or (also) an Alias for its members. You can assign several fields as a property but only one can also serve as an alias. Once you have defined a field as an alias, DeltaMaster will remove any previous reference to an alias. The property itself will remain intact.
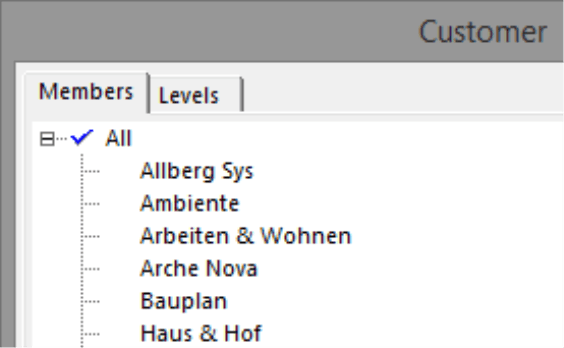
The Filter Browser (i.e. the name of the Dimension Browser in DeltaMaster 6) will display the assigned alias in place of each member. The customer IDs, which were hard to read, are now gone.
In DeltaMaster 6, you can also view the defined properties on the Levels tab. This tab is only displayed in Model mode, not in Edit or Report mode. If an alias has been defined in Model mode, it is valid for the entire application.
If you need to use a different alias for individual reports in DeltaMaster 6 or DeltaMaster 5, you can define this in the Axis Definition (see DeltaMaster clicks! 11/2015).07
