![]()
Greetings, fellow data analysts!
Every computer user knows how egocentric today’s operating systems and software programs can be. Just seconds after the login, you get bombarded with questions and messages that pop out of nowhere and demand your attention. “Do you want to participate in a survey to improve the user experience? Should XY search for updates? The performance optimization is complete. Your profile is being updated. Start search for new add-ons? Minimize database size? Maximize search function?” You really need to stay focused so that you don’t forget what you wanted to do on the computer in the first place.
Since people only have a limited ability to concentrate on things, we believe it is wiser to approach with caution. That’s why DeltaMaster holds off with questions yet is ready to deliver answers so that you can do your work. The program offers many different shortcuts – some even as early as the startup. With the right settings, for example, you can jump directly from your desktop to your report presentation with a simple double click. We’ll show you how in this edition of clicks!.
Best regards,
Your Bissantz & Company team
People who want to concentrate on their numbers are grateful when they have easy access to them. That doesn’t just apply to presentation and analysis. It even begins with fundamental procedures such as starting the program. You know the routine: you start up DeltaMaster, search for an analysis session, open it, log on to the database, look for the desired report, and open it. Although most users quickly have those steps down pat, there is a faster and easier way to work through them. Many report consumers, for example, have added shortcuts to their Windows desktops so that they can directly open a specific report in a DeltaMaster analysis session. All they need, then, is a double click to access it. In this edition of clicks! we will explain how you can create these types of shortcuts to simplify the way you access DeltaMaster. In addition, we will show how you can use command line parameters to create highly customized settings.
Activate an automatic database login
One step that you can eliminate, for example, is the database login. This automatic login applies to all user levels (except for Offline reader). When you open the analysis session, DeltaMaster will then connect to the underlying database in order to retrieve the current numbers from the data warehouse. You can automate this step provided that the underlying database products and interfaces support it.
You can use an automatic database login, for example, with Microsoft Analysis Services and other databases with an ADOMD .NET interface. The screenshot on your right shows the respective login dialog box. If you activate the option to Automatically connect using this information, DeltaMaster will log in using either an Integrated Windows authentication (i.e. the account of the respective Windows user) or a predefined username and password. Please note that an automatic login with a set username and password could pose a security threat and, therefore, is only intended for “technical” users (see DeltaMaster deltas! 5.4.9, feature #1).
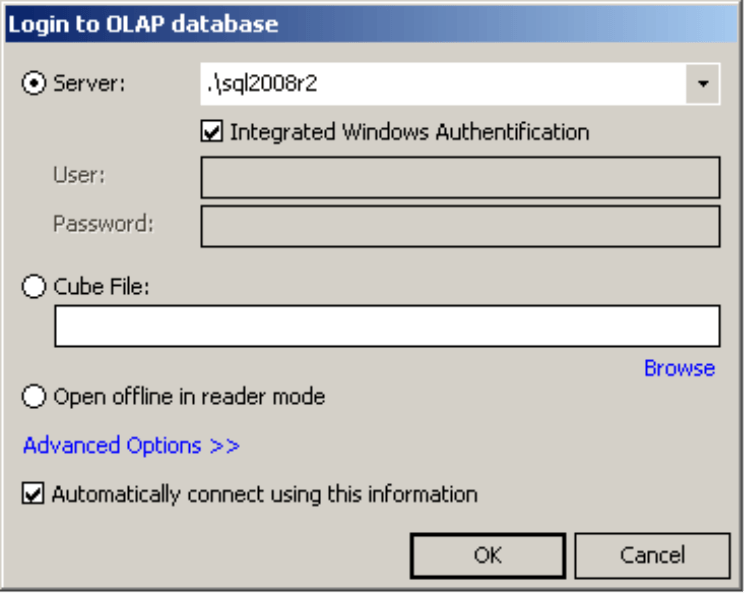
Automatic login settings are saved in the analysis session (.das file). If it is activated, DeltaMaster will attempt to log into the database while opening the analysis session. You as a user, therefore, can skip that step. The login dialog box will only appear if the login has failed, for example, because the server is not available.
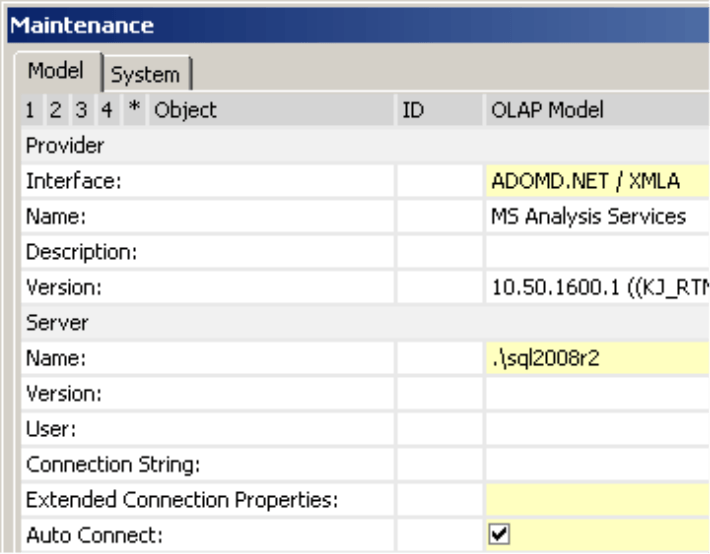
If you wish to deactivate the automatic login, simply open the analysis file in the Maintenance dialog box of the Model menu or from the context menu of the file on the Portal page. Here you can deactivate (or reactivate) the Auto Connect for the OLAP and relational databases as you please. Power users who wish to temporarily work around the auto connect can also use the following trick: If you are on the Portal page and click on an analysis session while holding the Shift key, DeltaMaster will override the automatic settings and display the login dialog box.
Select a start mode
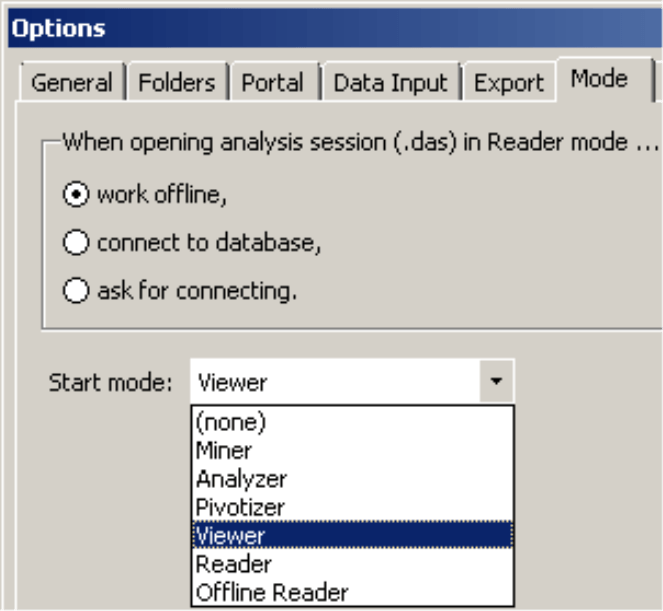
Now that you have automated the database login, let’s choose a standard Start mode such as Reader or Viewer. These user levels are well suited as a Start mode because you can easily view and access the available reports whenever you open a session.
Some users only work in Reader or Viewer mode because no other licenses are available. However, even advanced users who could work in higher levels also like to use these modes to start. On Reader or Viewer level, for example, you can easily browse through the reports using the links in the status bar. Their menus also have fewer options due to the more limited functionality.
![]()
In the Extras menu under Options on the Mode tab, you can select which Start mode DeltaMaster should use when opening a session. If you distribute analysis sessions as part of your standard reporting, for example, it makes sense to choose Reader or Viewer mode.
Define a start report in the analysis session
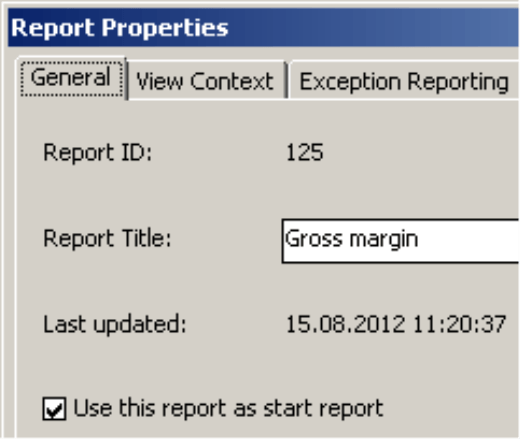
Another way that you can make your analysis sessions more user-friendly is to set a Start report. DeltaMaster will then automatically display that report (e.g. an overview of key figures as a budget-actual comparison) whenever the analysis session is opened.
To Use [a] report as a start report, simply activate the respective option in the Report properties (context menu of a report in the Briefing book on Pivotizer, Analyzer, and Miner levels). If you previously chose another report as the start report, DeltaMaster will automatically remove this selection because you may only have one at a time.
If no start report is selected, DeltaMaster will display the title page of the first folder in the briefing book in Reader and Viewer modes. If you haven’t customized the title page settings (Title page tab in the Folder properties on Pivotizer, Analyzer, and Miner levels), DeltaMaster will only display the folder title, thereby, leaving most of the screen empty. Some people feel that this looks elegant; the briefing book is placed neatly in front of the user and is just waiting to be opened. On the other hand, you could immediately show a report and instantly present the user with the most important information – and eliminate yet another click. We recommend, therefore, that you always select a start report.
Start program via shortcuts
The settings that we have just described affect what DeltaMaster does when it opens a session. You can automate the database login, the start mode, and even the first report displayed. Beyond that, you can also customize the DeltaMaster program startup itself. In Windows, for example, you probably start many programs using shortcuts, for example, by double clicking on a desktop symbol or clicking on a program name in the start menu. You can customize these shortcuts using command line parameters which DeltaMaster runs during the program startup.
Creating shortcuts
But first, let’s start with a few basic Windows skills. There are many different ways to create a shortcut to start DeltaMaster. One option is to open the file directory where DeltaMaster is installed (e.g. “C:Program FilesDeltaMaster 5.5.2“), open the context menu of the “Client.exe” file, and select Create shortcut. (This works with other files as well.)
![]()
If you use Windows XP, Windows will automatically create the shortcut in the same directory, right next to the original file.
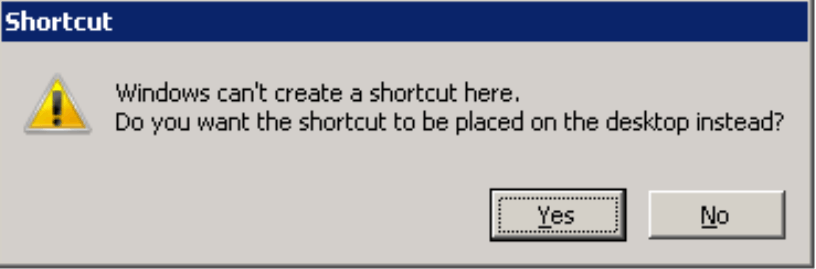
If you use Windows Vista or Windows 7, you generally cannot add a shortcut to the program directory for security reasons. Instead, Windows will ask if you want to create the shortcut on your desktop – which is good because that is where you usually would want them in the first place. You could, however, copy or move the shortcut to another directory at any time.
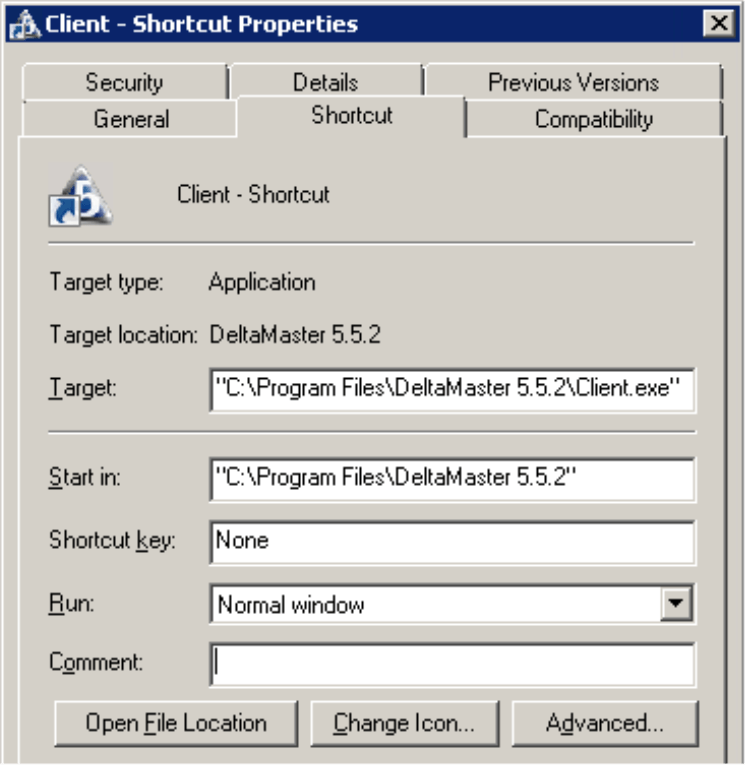
You can now edit the command line in the shortcut’s Properties (context menu) on the Target field. Initially, this field will only contain the path to start up the program, for example:
“C:Program FilesDeltaMaster 5.5.2Client.exe”
Please note that you must place the entire file name in quotation marks. Empty spaces are permitted.
Start DeltaMaster and open an analysis file
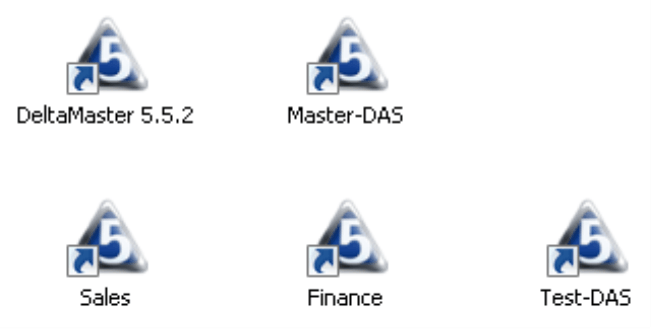
The most common scenario for using shortcuts is creating desktop symbols so that you can open a specific analysis session with just a double click. This saves an additional step because both DeltaMaster and the analysis session are opened at once (instead of having to open DeltaMaster first and then select the session in the Portal).
You can create this type of shortcut in one of two ways. You can either create a shortcut of the DeltaMaster executable file (i.e. “Client.exe”) and enter the analysis file on the command line, or you can simply create a shortcut of the analysis file.
In the first case (i.e. program shortcut, entering the analysis file on the command line), the command line could look like this:
“C:Program FilesDeltaMaster 5.5.2Client.exe” “C:Chair AGSales Analysis.das”
Behind the executable file (i.e. “…Client.exe”), you simply add the parameter (i.e. the desired analysis file) separated by a space. If the path or file name contains any empty spaces, simply enclose the parameter in quotation marks.
In the second case (i.e. shortcut of the analysis file without “client.exe”), the command line could look like this:
“C:Chair AGSales Analysis.das”
Although a shortcut that directly refers to the .das file works similarly to the other described before, the underlying process is different. When you open this type of shortcut (or the analysis file without a shortcut) Windows will first determine which application is registered for .das files (i.e. DeltaMaster) and then open DeltaMaster with the respective file as a parameter on the command line. The advantage of using this type of shortcut is that if multiple DeltaMaster versions are installed or if you later install DeltaMaster on a different directory, Windows will always start the most current DeltaMaster version. The disadvantage is that you cannot use additional command line parameters as described below. They only work if you manually add the link to the executable program.
Start DeltaMaster and open the application from the repository
Some DeltaMaster customers do not distribute briefing books as analysis files. Instead they save these applications to a repository or central database. If you have these types of applications, you can use the command line parameter “-app:X”, whereby “X” stands for the ID of the application in the repository:
“C:Program FilesDeltaMaster 5.5.2Client.exe” -app:2
The application ID (in this case: 2) is listed on the Portal page prior to the application’s name. Please enter the ID in the command line directly behind “-app:” without using any spaces. For more information, see DeltaMaster deltas! 5.5.0, feature #20.
Start DeltaMaster and open a specific report
If you add the parameter “-report:X”, you can also add the start report “X” to the shortcut. DeltaMaster will then automatically display this report as soon as you open the analysis session or application. This switch will override a start report that is defined in the analysis session. As a result, it is primarily designed for analysis sessions that are centrally published for multiple users. With the command line parameter, users can select their own personal start reports regardless of the central standard.
In this case, the command line could look like this:
“C:Program FilesDeltaMaster 5.5.2Client.exe” “C:Chair AGSales Analysis.das” -report:125
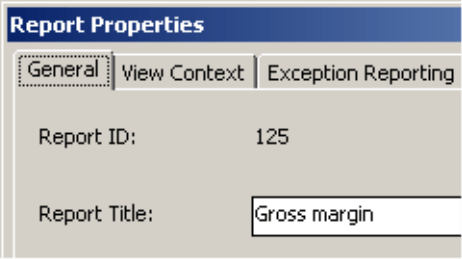
The report ID (here: 125) is located in the Report properties. Please enter this ID in the command prompt without any empty spaces directly behind
“-report:”. You can also view the ID as a tooltip if you hold the Alt key while mousing over a report in the Briefing book. Please note that the shortcut target must be the executable file from a DeltaMaster installation (i.e. “Client.exe”). If the shortcut only contains a .das file, the “-report” parameter will not work.
Start DeltaMaster and open a specific report in presentation mode
If you add the “-presentation” parameter, DeltaMaster will automatically open the analysis session, application, or report in presentation mode – just as if you had pressed the F5 key or Shift + F5. This is a very convenient way to start DeltaMaster because it opens the desired report using an automatically generated layout in full-screen mode. In this case, the command line could look like this:
“C:Program FilesDeltaMaster 5.5.2Client.exe” “C:Chair AGSales Analysis.das” -report:125 -presentation
For more information about presentation mode, please read DeltaMaster clicks! 09/2009. One major change since then is that presentation mode now also offers Viewer functionality so that you can change the view and execute a predefined drill down during a presentation.
Start DeltaMaster in kiosk mode
DeltaMaster’s kiosk mode is the sequel to presentation mode. Instead of merely displaying a report, it automatically changes the display from one report to the next in an endless loop. Since no user interaction is necessary, you can use kiosk mode in places where people cannot or should not “touch” the reports, for example, in production plants, open-plan offices, cafeterias, office kitchenettes, break rooms, hallways, or meeting areas.
You can start kiosk mode with the “-kiosk” command line parameter. By adding additional parameters to this switch, you can define which reports or folders you want to present from the briefing book. With “-interval:X”, you can also modify the display time (the default duration is 30 seconds).
An example of this type of command line could be:
“C:Program FilesDeltaMaster 5.5.2Client.exe” “C:Chair AGSales Analysis.das” -kiosk -interval:15
In this case, DeltaMaster would open the listed analysis session, change into presentation mode, display the first folder of the briefing book, and then switch to the next report or folder every 15 seconds.
In the following modified call-up, DeltaMaster would switch among three reports with the IDs 41, 97, and 125, and display them each for a period of 30 seconds:
“C:Program FilesDeltaMaster 5.5.2Client.exe” “C:Chair AGSales Analysis.das” -kiosk:r41r97r125
For more information on kiosk mode and its command line parameters, please read DeltaMaster deltas! 5.4.5, feature #13 or DeltaMaster clicks! 01/2011. In clicks!, you can also read up on how you can fully automate kiosk mode – even down to turning on the computer.
Start DeltaMaster and select languages
With the “-language:X” parameter, you can automatically display the DeltaMaster interface in a specific language – as if you had directly selected it from the Options (Extras menu, General tab). The parameter “X” stands for the acronym of the desired language, for example, “en” for English, “de” for German, or “es” for Spanish. In order to start DeltaMaster in Spanish, therefore, you could use the command line:
“C:Program FilesDeltaMaster 5.5.2Client.exe” -language:es
The “-aliasset:X” parameter also affects the language settings, namely which alias set DeltaMaster should use after opening the analysis file. The parameter “X” stands for the name of the alias set as it is displayed in the Model browser (Model menu) or in the Options (Extras menu), both on the Alias sets tab. You can define alias sets in analysis sessions. As a result, this option only makes sense if an analysis file or repository application is listed on the command line.
To activate the English alias set at the start of the program, you could use a command line such as:
“C:ProgramDeltaMaster 5.5.2Client.exe” “C:Chair AGSales Analysis.das” -aliasset:”Chair_English”
The purpose of both language switches is similar to the “-report” switch – namely, that DeltaMaster should override a setting that is saved in the analysis file. In the case of languages, this makes sense because multiple users access the same analysis session or application but in different languages. As a result, each user can create an individual shortcut in order to customize the language, reports, cockpits, etc. in DeltaMaster. For more information, please read DeltaMaster deltas! 5.5.1, feature #5.
Questions? Comments?
Just contact your Bissantz team for more information.
Reference sheet for command line parameters
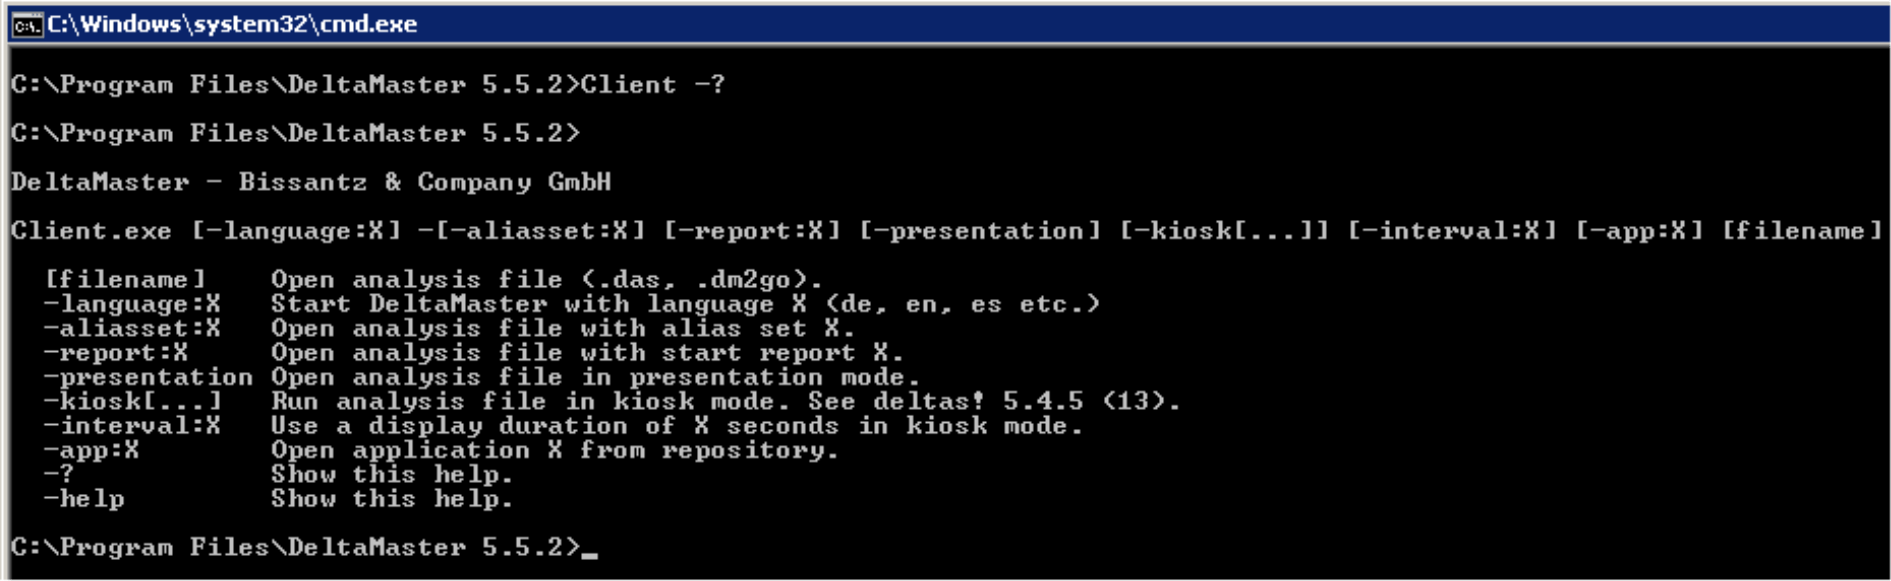
| [File name] | Opens the analysis file (.das, .dm2go) |
| -language:X | Starts DeltaMaster with the interface language X Currently supported languages: de, en, es, fr, it, nl, pt, ru |
| -aliasset:X | Opens the analysis file with alias set X (Please enter the alias set as it is displayed in the model browser, if necessary, in quotation marks.) |
| -report:X | Opens the analysis file or application with the start report X |
| -presentation | Opens the analysis file, application, or report in presentation mode (“F5”) |
| -kiosk[…] | Plays the analysis file or application in kiosk mode Optional parameters determine which reports and folders are displayed Further information: DeltaMaster clicks! 01/2011, DeltaMaster deltas! 5.4.5 (13) |
| -interval:X | Shows each report for X seconds in kiosk mode (standard time = 30 seconds) |
| -app:X | Opens the application X from the repository More information: DeltaMaster deltas! 5.5.0 (20) |
| -? -help |
Displays a short description of the command line parameters |
