![]()
Greetings, fellow data analysts!
Many artists feel that art doesn’t just belong in a museum. It should also be where people are – in living rooms, in cafes, on the street, in city squares, or wherever else they congregate.
Similarly, we think that Business Intelligence doesn’t just belong in supervisory board meeting rooms or executive suites. It should also be in the offices where people make operative decisions day after day – or places where colleagues meet and reflect about their business. People exchange information in production halls, open offices, cafeterias, kitchenettes, break rooms, common areas, hallways, and meeting rooms. And when they ponder and discuss things, new ideas emerge as well.
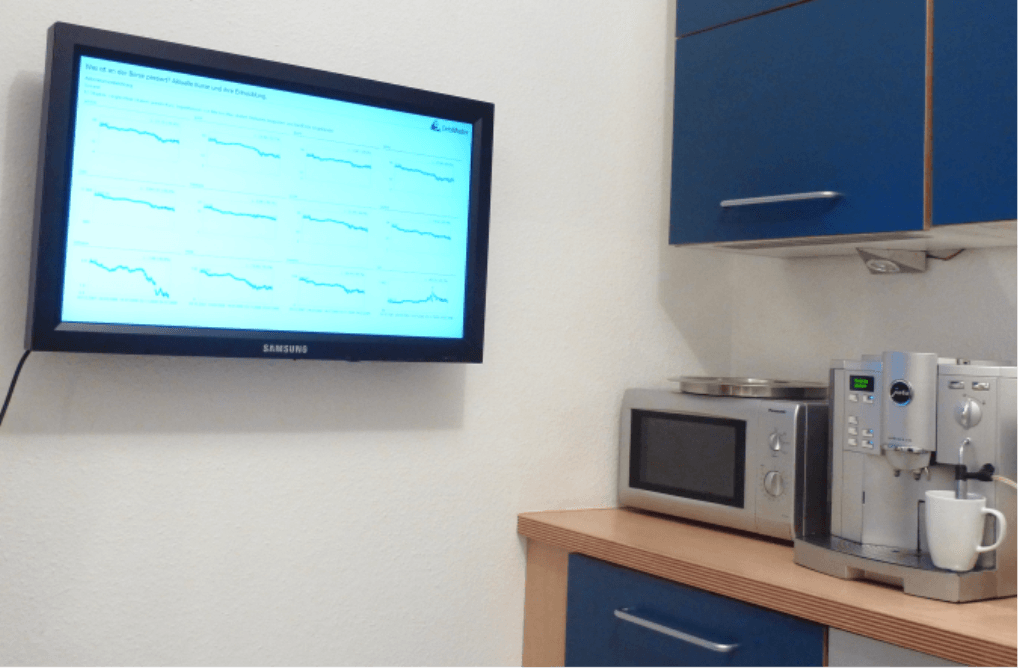
Meeting places are also an optimal setting for presenting select information gained from Business Intelligence so that employees think about it, discuss it, and (maybe) even get inspired by it. You can easily organize your BI ‘exhibit’ using the new kiosk mode in DeltaMaster. You will see that DeltaMaster isn’t just an important tool for data artists; it also has the power to mesmerize an audience as well.
Best regards,
Your Bissantz & Company Team
One of the key themes in DeltaMaster is automation: automated analysis, report construction, distribution, etc. Now you can even automate how you present reports using the new Kiosk mode in DeltaMaster 5.4.5.
In kiosk mode, DeltaMaster displays an analysis session as it would in presentation mode but automatically flips from one report to the next in an endless loop, updating the reports from the database each time. Since kiosk mode runs fully automatically, you can use it where you can’t have (or don’t want ) any user interaction. In the introduction on page one of this issue of clicks, we have already listed multiple ways how you can use this new function.
You can start this automatic presentation from any PC or laptop. A typical kiosk system, however, is usually run in a public room, often in its own separate booth or on a screen attached to a wall.
Kiosk mode does not require a special license. You can use it with any licensed DeltaMaster installation in version 5.4.5 (or higher). If you only want to use the computer in question as a kiosk system, all you need is a single named user license for the Reader level.
Creating a shortcut to start
Kiosk mode is not a setting in DeltaMaster or an analysis session. Instead, it is activated by a special parameter in the command prompt when you start DeltaMaster. In Windows you can define command prompt parameters in shortcuts, i.e. the icons you use to open a program from your desktop or start menu.
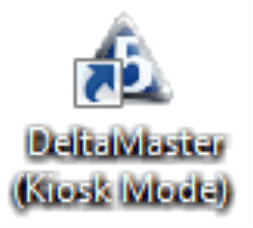
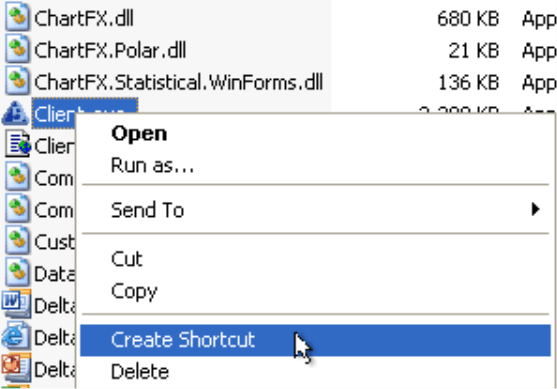
To test kiosk mode, simply create a new shortcut to DeltaMaster and place it on your desktop. You can do this by opening Windows Explorer to the DeltaMaster installation directory (e.g. ‘C:Program filesDeltaMaster 5.4.5’), selecting the ‘Client.exe’ executable with a right mouse click, and choosing the Create shortcut option. This will generate a new file called ‘Shortcut to Client.exe’. You can now rename this file ‘DeltaMaster 5.4.5 (kiosk mode)’ and drag it onto your desktop.
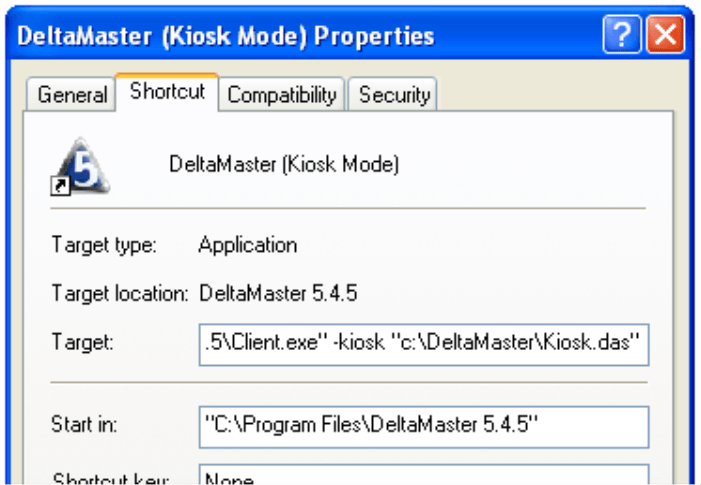
The command prompt that you need to change to activate the kiosk mode is located in the shortcut’s Properties (context menu) under the Target field. If you have just created the shortcut, you will only see the simple DeltaMaster command, for example, “C:Program filesDeltaMaster 5.4.5Client.exe”.
You can expand this Target with the switch ‘-kiosk’, followed by the name (including the path) of the analysis session (.das file) which you would like to present. The command (i.e. Target) would then look like this:
“C:Program filesDeltaMaster 5.4.5Client.exe” -kiosk “C:DeltaMasterKiosk.das”
And that’s it! If you now double click on this link, DeltaMaster will start, open the listed analysis session, change into the full-screen presentation mode (as you normally would if you hit the F5 key), and display all folders and reports in the briefing book one after another. After a 30-second period, DeltaMaster will switch to the next folder or report. After displaying the last report of the last folder title page, the presentation will automatically start again from the beginning (i.e. endless loop) and continue until you stop it by hitting the Esc key. This action will not close DeltaMaster; it will simply transfer you into a regular analysis session.
If you would like to prepare multiple analysis sessions for an automatic presentation, you can generate a separate shortcut for each session.
Title pages
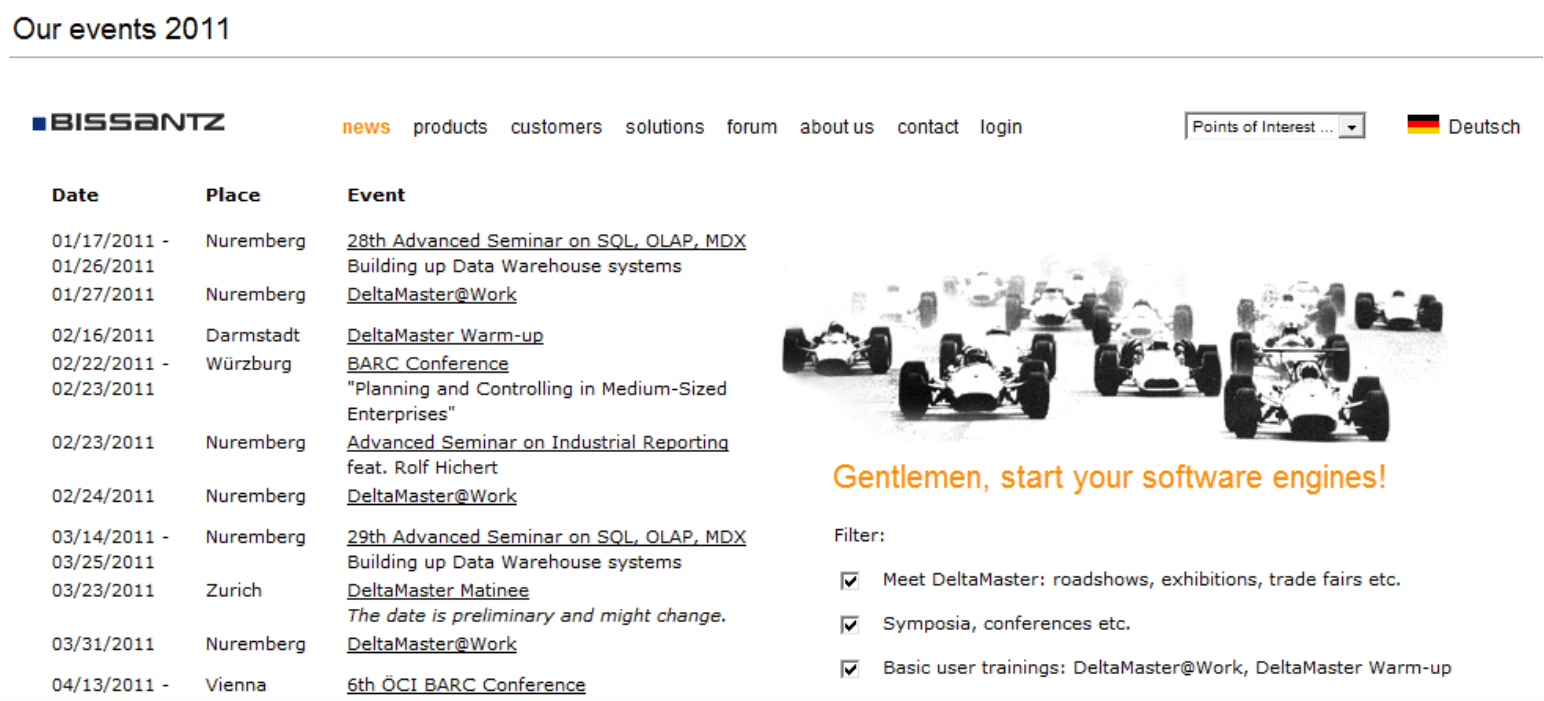
At a newsstand you often only see the front covers of newspapers and magazines; browsing or reading is discouraged. The exact opposite is the case with DeltaMaster. Here, it is all about content – in other words, the reports that are stored in the folders of the Briefing book. The title pages of the folders make it easier to structure the briefing book and give your readers a better orientation when they are working with it interactively. Folder, report, and action titles, however, don’t provide much information in an automatic presentation and simply leave your audience waiting in suspense.
As a result, DeltaMaster only displays the title pages of the folders when a URL is defined in the Folder properties (context menu of folders in the Briefing book).
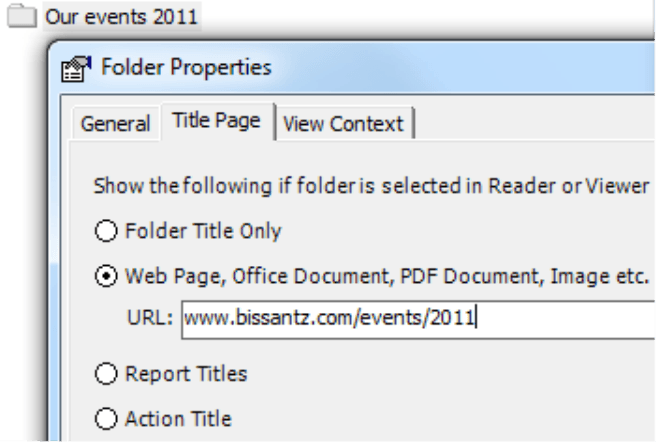
You can also use this option to integrate Web sites, JPEG images, Microsoft Office files, or PDFs into the automatic presentation.
Setting the display duration
You can set how long each of the reports should be displayed using another optional command prompt switch:
“C:Program filesDeltaMaster 5.4.5Client.exe” -kiosk -interval:x “C:DeltaMasterKiosk.das”
Here, ‘x’ stands for the desired display duration in seconds. If this option isn’t listed, the standard value of 30 will be applied.
Personalized program
You can extend the ‘-kiosk’ switch so that DeltaMaster only presents select reports or folders from the analysis session:
“C:Program filesDeltaMaster 5.4.5Client.exe” -kiosk:rafbfc* “C:DeltaMasterKiosk.das”
- To display a report, use the abbreviation ‘r’ followed by the report’s ID number (‘a’ in the example above).
- To show a folder, use the abbreviation ‘f’ followed by the folder’s ID number (‘b’ in the example above). DeltaMaster will then display the title page of the folder (if a URL was defined in the Folder properties on the Title page tab) followed by the reports contained in the folder. This option will not include any subfolders.
- To show a folder structure (i.e. a folder including its subfolders), use the abbreviation ‘f’ followed by the folder ID (‘c’ in the example above) and an asterisk (‘*’). DeltaMaster will then display the title page of the folder (provided that a URL is defined), all of the reports contained in that folder, all of its subfolders (and title pages if applicable), and all of the reports contained in those folders in the same order that they are saved in the Briefing book.
You can obtain the report and folder numbers from the tooltip that appears when you press the Alt key while mousing over the respective report or folder. This ID is also listed in the Report or Folder properties.
You can string these entries together – without empty spaces –so that you can create the ‘script’ of the kiosk presentation as you wish without having to make any changes to your briefing book.
Example: The switch ‘-kiosk:r1r3f12r4f5*r5’ starts a presentation with the following screen sequence: Report 1 (‘r1’), Report 3 (‘r3’), the title page of folder 12 (‘f12’ – if a URL is defined for it), all reports contained in folder 12 but not including any subfolders, Report 4 (‘r4’), the title page of folder 5 (‘f5*’), all of the reports including the subfolders contained in folder 5 in the same order as they are saved in the Briefing book, and Report 5 (‘r5’). After this cycle, the presentation will start again with Report 1. All other folders and reports that are contained in the briefing book will not be displayed.
Reports are updated automatically
In Kiosk mode, DeltaMaster automatically recalculates the reports with the latest information from the database before each display. This is very interesting for overviews that change over the course of the day. The only exceptions occur when DeltaMaster runs on an Offline reader license or the Start mode of the analysis session is set to Offline reader (Extras menu, Options, Modus tab). In this case, DeltaMaster will not update the results; the reports that are to be displayed, therefore, must already be calculated in the analysis session (.das file). To update this data in regular intervals, you could use ReportServer.
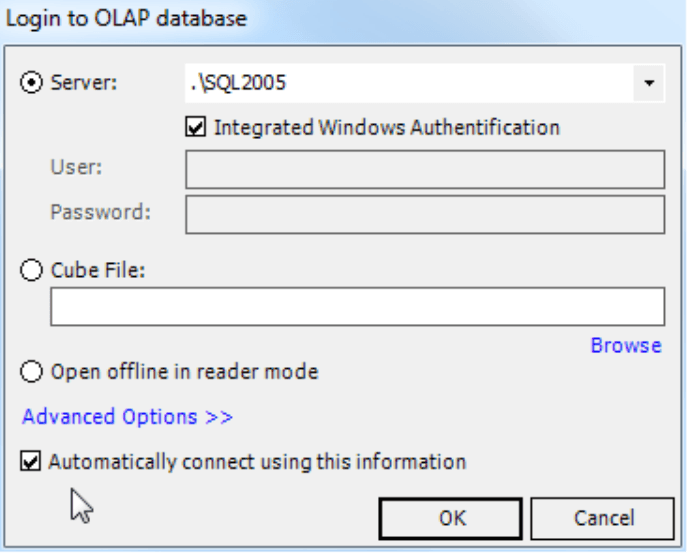
Automatic database login should be activated
You can present each analysis session in kiosk mode without having to make any special edits or preparations. To start the presentation without further prompting, you should configure the analysis session (.das file) so that DeltaMaster automatically logs into the OLAP database and, if applicable, into the relational database. Otherwise, user interaction will be necessary because the normal dialog box will appear and prompt you to log into the database.
You can activate the automatic database login in the respective dialog box in the Model browser (Model menu).
Starting DeltaMaster automatically
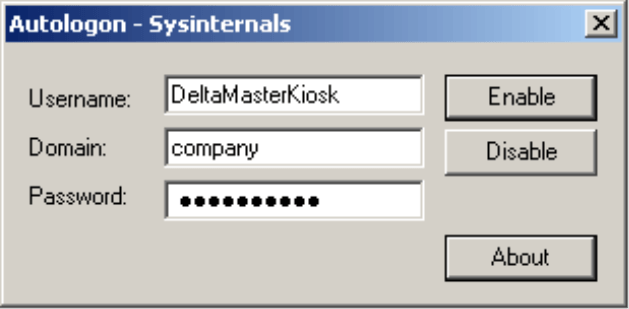
With the right command prompt in a short cut, DeltaMaster can start the presentation automatically. But how can you start DeltaMaster automatically? The operation system is responsible for that. One way would be to use the known ‘Auto start’ folder in the Windows start menu. If you copy your shortcut with the switch for kiosk mode here, Windows will automatically run the program as soon as the system starts or a user has logged on.
Windows will first process the ‘Auto start’ folder when a user has logged on to the system. If you want your kiosk to run without supervision, however, that could pose a problem. Fortunately, all current versions of Windows contain a mechanism to support automatic logons. The easiest alternative is to activate and configure this option with Autologon, a small program from Microsoft’s free ‘Windows Sysinternals’ offerings (Download and more information: http://technet.microsoft.com/en-us/sysinternals/bb963905). Autologon will prompt you for the user name, domain, and password before encrypting and saving the login information to the Windows registry. Please note, that this user profile must have adequate rights to the database.
Questions? Comments?
Just contact your Bissantz team for more information.
